Posts

Genre Research: Thrillers
Image
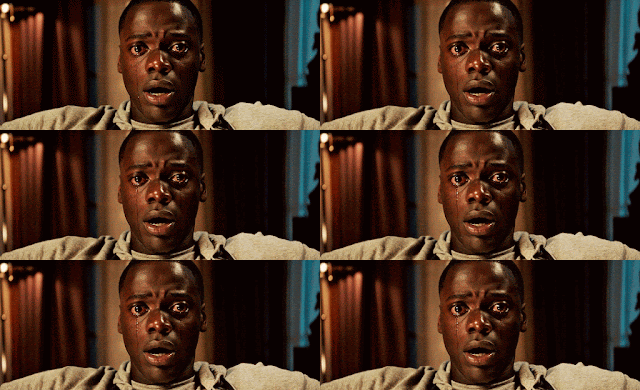
 Starting off with thriller, the genre my pitch will be following. A favorite of mine, as movies like “Get Out” (2019) and the classic “Psycho” fall under this category, I thought it was only fitting to research this one first.  CAMS  In the thriller genre, filmmakers often employ high-contrast lighting to create intense shadows and suspenseful atmospheres. They strategically use low-angle shots to instill a sense of vulnerability and rely on both steady and handheld camera movements to evoke tension and urgency. Close-up shots capturing characters' facial expressions and conveying emotions, along with tracking shots to build suspense, are prevalent techniques. SOUND As for sound, Thriller films commonly incorporate tense and suspenseful music to elevate the mood. they also like to use periods of silence followed by quick, jarring noises. Thriller films like to use high intensity music in moments to engage the audience and keep them on the edge of their seat. CLAMPS Shado...
Pitch Blog

Image
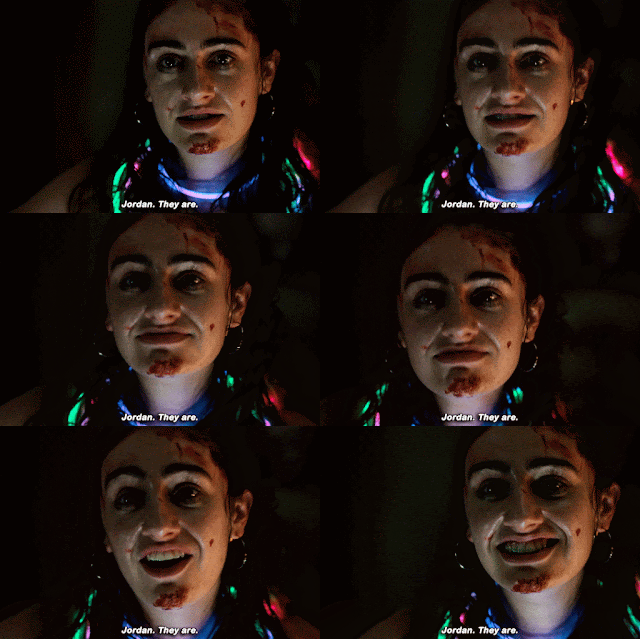
    Here are my pitches for my short film final project. Though, most of these need to be workshopped. I have a lot of big ideas but working by myself, most of these are a bit too large scale, but I am aiming high for the production value of my project. Overall, I see many of these ideas changing in their final form but as for now, these are some of the interesting ideas for a short film I have come up with.  Pitch A: Home alone at night, a girl receives mysterious calls alluding to the fact someone is watching her, and when she thinks she is finally safe, everything goes wrong.  Pitch B: A group of friends tell a scary story about the mysterious place they are in, only for the end to reveal the “campfire story” was a real thing and not just a tall tale. For Pitch A, I have a very clear idea of what I want to do. This concept will be inspired by the opening sequence of the original Scream movie. One of my favorite horror movies of all time, Scream pioneered a wavelen...

Group Blog

Image
 For the rest of this year, I will be working solo! Just like last year, but we only have one main project this year, so I will be doing a lot of work by myself I guess. The main reason for my choice is that by working alone, I think I can get work done a lot better! All of my friends are is AS level, so we could not work together. However, I’m not sure I would work with my friends even if I could! Funny enough they all worked together on their AS level assignments, and I heard complaints from all sides. I think everyone will have their own vision for a project, and it’s hard to make something that works for everyone. I think it’s impossible to be 100% happy with a group assignment you didn’t do everything for! Therefore, I think working by myself will do just fine. Working alone was a trend from last year that I think should carry into this year. Another thing I’m looking forward to is being able to work at my own pace. Having to coordinate with other people can get annoying. The ...

Intro Blog

Image
 And we’re back! This is this first blog for the new year, my intro. Except his time around I am now a junior, and I am in A-level. Not much has changed about me since last year, besides for the fact I am now facing the tribulations of junior year. I still love the same music artists (swiftie for life!) TV shows, and hobbies. This year I made the soccer team, which has been an amazing experience so far. Plus I got job over the summer, which I am still working. Two to three practices/games per week and four days of working has definitely taken a toll on me. The four AP classes I picked when I was feeling overconfident last year are also DEFINITELY not helping. Despite how busy I’ve been, junior year has honestly been just alright, with friends really being the only good part.   Taking this class was honestly an easy choice. Last year, media studies was absolutely my favorite class. Despite the C I got (thanks, I guess.)  Looking foward to it every day, I just lived th...

Creative Critical Reflection

Image
 Here is my creative critical reflection. After a few days of work, I think I can say I love this product even more than my video! Have a look, and hear what I have to say about my final task project.

Final Task

Image
 THE TURNING Here is my final task video. Safe to say I am extremely proud of it and so pleased to share. Enjoy.

Final Changes

Image
Today is the day that I have to make the final changes to my two-minute film project for my class. Essentially, this means applying all the feedback my friend Julie gave me in my previous blog! While a lot of their critiques were definitely valid, they were a bit to unrealistic for me to actually take. For example, this far into production I could never completely change my story and make it have more “meaning”. However, I can fix choppy editing, awkward cuts, and any other things they mentioned! After receiving feedback from my friend Jane, I spent a lot of time working on improving the story and characters. I wanted to make sure that my film had a clear message and that the audience would be able to connect with the characters on a deeper level. You may be asking how I did this this far into the porous room process. And the answer was, even more reshoots! Bold, I know, but I felt it had to be done. I added in some very simple shots, one that only showed the character looking off into...

Peer Review

Image
  Today, I showed my two-minute film project to my friend, Julie I was really nervous about it because I had put so much effort into it, and I really wanted her to like it, as well as get new advice on how to improve it before final submission. At first, Jane seemed really interested in the film. She was focused on it and didn't say anything for the entire two minutes. When the film was over, she took a deep breath and looked at me with a serious expression on her face. She started off by saying that she thought the film was really well made. She complimented the cinematography, the editing, and the sound design. She said that I had a good eye for visuals and that I had clearly put a lot of thought into every shot. However, she did have some constructive criticism for me. She said that she felt like the story was a bit weak and that she didn't really understand the point of the film. She suggested that I work on developing the characters more and giving them clearer motivations...

Back to CapCut!

Image
With my last few blogs, I had the task of reshooting all my unusable footage. This proved frustrating as I had already fully edited my short sequence. So, having to go back and reshoot, then take apart my project, THEN insert those clips back in, was difficult.  As I watched the horror short sequence that I had made for my class project, I realized that it needed a lot of work. The pacing was off, and the scares weren't as effective as I had hoped. I knew that I would have to re-edit the entire sequence if I wanted to improve it. It was frustrating to have to start over, but I was determined to make it better.  I began by rearranging the order of the shots to create a more cohesive story. Next, I focused on the sound design, adding in more atmospheric sound effects to heighten the tension. I also experimented with different music tracks to find the perfect score for the sequence. The music I used in the first half of the sequence sounded slightly corny. So I did more research ...

Re-re Shoots

Image
 As you may know from my previous blogs, I have been doing reshoots all throughout this production process. Before I even finished the script, I was eager to take some scenery and time-lapse shots to use in my opening sequence. But now that the final film has been shot, there are many things that need to be tweaked. And then there are some things that need to be completely redone. That is what this step in the process is for! Fixing the angle of my phone on a makeshift tripod was a challenging task. I had to make sure that the camera is level and not tilted to the side. It was also important to check if the camera is positioned at the right height and distance from the subject. Any sudden movement or bump can knock the camera out of alignment, so it was essential to ensure that the camera is secure and stable. Between shots I often accidentally adjust the camera a few units to the side, making the next shot off. Now, I ensured that I was extra careful when handing the phone in any ...

Onto Editing

Image
As I am working on the opening sequence for my horror short film project for class, I am currently in the process of editing shots on my iPhone. I must say, it has been a challenging but satisfying experience, and I am eager to share my journey with you. After shooting the footage, I spent time reviewing the shots and selecting the best ones that fit my vision for the opening sequence. I wanted to make sure that each shot was visually engaging and conveyed the mood and tone of the horror genre. To start the editing process, I used various editing apps on my iPhone to piece together the shots. My main used ones were CapCut and Inshot. InShot is more familiar to me, but CapCut is far more efficient as I have recently learned. I experimented with different transitions, filters, and sound effects to create a cohesive and engaging final product. I wanted the opening sequence to be gripping and to grab the audience's attention right from the start. So, I focused on starting with an unusu...

Finally Filming

Image
The day has come, it is now time to film. I have spent weeks planning and visualizing my opening sequence. But now, it is time to put pen to paper, or rather, words into live-action  The process has been both challenging and rewarding, and I am excited to share my experience. Before filming, I had to do the actor's makeup to ensure that he looked the part. I spent time researching and practicing different techniques to create a realistic and believable look. That was earlier though, and now I got to do it all myself. It turned out just how I had hoped, achieving the undead effect I was going for. It was a challenge, but I was happy with the final result. During filming, I had to be creative with the limited resources I had. I experimented with different angles and perspectives to create visual interest and used natural light to create a moody and atmospheric vibe. I also had to improvise and come up with solutions to problems as they arose. One was the ever-changing lighting. Once ...

Working the Camera

Image
 After preparing for costumes I feel the next step in production is working on the filming equipment. While my two previous media studies projects were also filmed on a phone, I feel for this next one I need to perfect this medium. This opening sequence will require a far more professional look, and it's time I adjust my filming process and make some changes. To start, I researched different techniques and tips for filming on an iPhone. I learned about lighting, angles, composition, and editing techniques that could help me create a professional-looking film. Next, I experimented with different camera apps to find the one that worked best for me. I also invested in some additional equipment, including a tripod and external microphone, to improve the quality of my footage. I spent time scouting locations and thinking about how I wanted to frame each shot. I experimented with different angles and perspectives to create visual interest and tell the story in a compelling way. During fi...

Prepping Costumes

Image
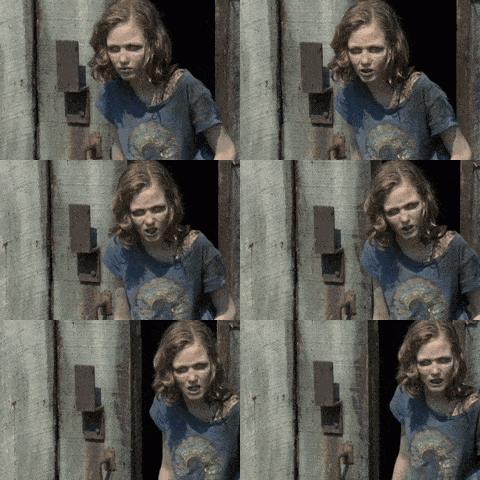
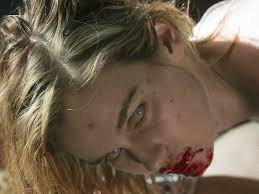
 Today was a more exciting day in the production process, as I got to researching and gathering materials for the costuming of my project. When it comes to costuming for my opening sequence, it will obviously all be very minimal. The main character will be wearing everyday clothing, and the only unique aspect of it will be the brother's makeup in the end.  This was a challenging task as I had to make sure the makeup looked realistic and scary enough to bring this undead character to life. To start, I researched different zombie makeup techniques and watched tutorials online to get some inspiration. The character will only be shown for a few shots in a dark setting. However, because this shot is the only one requiring makeup I feel it is immensely important I put some more effort into the look. I was especially inspired by this shot from the television show The Walking Dead. This character is almost identical to my character's physical circumstances, so it will make sense that...

Script Finalization

Image
  Writing a script is a process that can take a lot of time and effort, and it can be tempting to rush through the final stages to get it done. Especially as I move forward with my final task project, many new ideas have formed over time. Additionally, I think I have lost interest in some previous ideas. But, finalizing my script is one of the most important steps in my process, and it's important to take the time to get it right. That is why I have dedicated some time to tuning up my script. And that is what this blog will be discussing! One thing you may have noticed is the title! That's right, I have officially chosen a title for my opening sequence. While it took a bit of contemplating, I believe this one fits the themes of the project overall. However, with my apparent indecisiveness, I predict I will, in fact, change my mind about it later on. We can only find out! Taking a break from my script has helpt the writing process. Now that it has been a few weeks, I can come ba...

Pre-Production: Further Brainstorming

Image
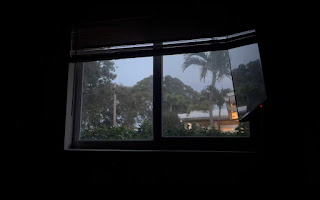
 As I continue on with my final task project, more ideas have been forming as I get to the more technical parts. While I created my script, it was a representation of the very first view of what I wanted my project to be. The script contained the original plan of my story. Since then, I've come to the realization that what I came up with may be too short to fill the two-minute time slot. To fix this I'm not going to add more lines because I believe that many complicate it and should be saved for another planning day. Instead, I'm going to plan to draw out certain shots. For example, there could be a bit of an intro that jus focuses on a window. The inclusion of this shot will be a clever way of adding time to the takes without interfering with any plot. This was a tactic I used for my first two projects. In my music video, you can see I added an intro with a still shot. Like that last project, I made start adding in a short sequence like that o display the production compan...

Opening Sequence Storyboard

Image
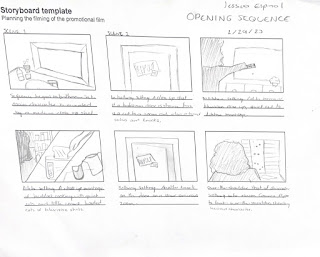
 Now presenting…my storyboard for the final task project. Prior to creating this storyboard, I created my script, which you may have seen. That was focused more on dialogue and actors performance, while this storyboard further visualizes the project. Sketching this storyboard was something I’ve been looking forward to, as ideas of what I fully wanted my sequence to be were very muddled in my head. Finally putting pen to paper and getting a strong plan together has really helped me further visualize the project, and overall, I feel a lot more prepared to get to the final step: production! Before I get ahead of myself, I should go over each panel and explain what I was thinking of for my storyboard. Not included in my storyboard: For the fifth panel, I don’t only want that door to open from that one high angle. Once we are moved to the hallway setting and the shot of the door cracked open is established, I want a shot change to smooth the transition into the bedroom setting. To do so...

Planning Blog: Title Design

Image
After completing my main planning for the opening sequence, the plan for my filming is entirely done. Settings, props, makeup, and schedule has been figured out, which just leaves editing! In the last two previous projects that had been the most difficult aspect of production. So looking forward to this project, there are improvements that need to be made. I have learned things since then that I can apply to this project, so I’m looking forward to working on! One aspect of editing that I will focus towards in this blog is the title design. The first font I will need to find is for the actors names, casting by, music by, visual effects, costume designer, editor, production designer, director of photography, producer, executive producer, story writer, and director. While these titles come on screen, the tone of the sequence will still be light and neutral. The setting is shot during the morning hours with the sun pouring in, creating a positive seeming film. To match, the font will be li...

Planning Blog: location, participants, health, schedule, and more!

Image
 Now that I’ve laid out my script, I feel a lot more relieved into production! Since the start of this final task my mind has been muddled about what I would actually like to create, but as script planning has finished I can move on to the smaller things. This being, well, more planning. But for the more trivial things, all to get the opening film sequence together. First, the matter of actors must be figured out. I am working on this final task project alone, meaning my actors must come from outside the class! There are only two characters, and due to difficult schedule planning, it wouldn’t be ideal to have any friends work with me. So, my solution is to have myself play the main girl character, and my younger brother play, well, the brother character. Casting my younger brother is obviously most workable since he will be available at all times, which will come in handy for reshoots if any issues with footage arise. Additionally, we are siblings! We fit each role best. Then comes...

Planning Blog: Scripts

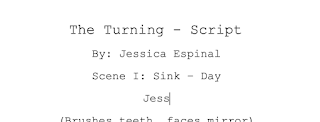
Image
 For the past few weeks I have had a vague idea of where I want to take my pitch. Envisioning my pitch idea, I see somewhat of a muddled mess of a scene play out, with not much direction of what I want to do. It’s time I sit down and figure out how I want my opening sequence to be, and this is the blog just for that!  When I think of a script I think about the traditional ones real actors get, explaining all details of the scene. That being when people enter, dialogue, directed actions, and all of that fun stuff. So, a script of that kind is what I will be creating here. On we go! OPENING SEQUENCE: SUBURBAN HOME- MORNING SCENE ONE: We start in a bathroom. The camera is facing a mirror, as suddenly a girl is revealed by flipping her head up. She is brushing her teeth to an upbeat tune. SCENE TWO: we are now in the hallway setting. The camera is positioned on a door, as the girl walks into frame, knocking on it. She calls out to her brother to wake up. SCENE THREE: The next scen...